Supplies:
- 2 – 3/4″ 10ft conduit pipes
- 1 – 3/4″ conduit coupling
- 3 – 2.5″ corner braces
- 3 – 1″ conduit straps
- 3 – screws / nuts / washers
- 2 – wine corks or 5/8″ dowel
- 2 – cabinet knobs (diameter of base same size as conduit)
- 2-3 cans – white metal primer spray paint
- 2-3 cans – any color spray paint you want for the rods – for this one I went with rusted bronze
- dry wall anchors – I like the self drilling ones
Tools:
- Drill
- Screwdriver
- Hacksaw
- Spray paint gun (do not spray paint without one of these – best $7 spent!)
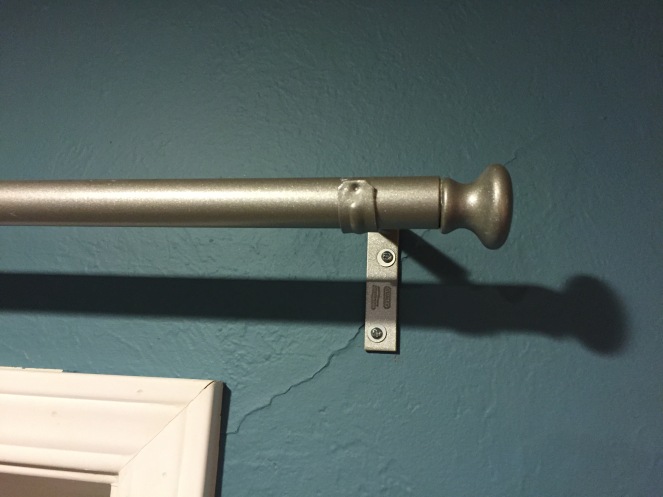
Step 1: Preview
This is what the finished rod looks like along with the rod support.
Step 2: Assemble the brackets
Take the L bracket and attach the conduit strap to it using the short screws / nuts / washers you purchased. I had to use washers along with the screws because mine too narrow to use alone.

Step 3: Cut the conduit
Measure your window length and add 3-4″ on each side for overhang. Measure, mark and cut your conduit – you can do this using a hacksaw – then sand or grind off the rough edges.
Step 4: Drill holes in the wine corks / dowel
Because I used 3/4″ conduit, I found that wine corks worked way better than a dowel and were easier to shave down in size to fit into the conduit. I found clamping the cork to the side of a piece of wood then drilling a hole through the center worked best. The hole size should match the screw that goes into your cabinet knob. Once the hole is drilled you can screw in / attach the cabinet knob. These will be the finials for your rod!

Step 5: Prime & paint everything
You will want to first prime everything with the white spray paint. This includes the finial/wine cork piece, the bracket/strap, the coupling (if you have 2 rods attached to each other) and the rod itself. You may need 2 coats depending on how it coats. The primer dries pretty quickly so you can follow up with a 2nd coat after 10-15 minutes dry time (if its a warm day).

Follow up with the actual spray paint color you want on all the pieces. Again, for this you will definitely need more than one coat, make sure everything is evenly coated and there are no white spots anywhere. For the rods you will want to prop them up off whatever you are painting them on so the paint doesn’t dry in a weird/uneven way. Let them dry overnight, preferably 24 hours – they may feel dry immediately but if you set them on anything the paint will stick and rub off later.
Step 6: Hang the rod on the wall!
Once everything is dry – attach the brackets to the wall using the dry wall anchors, connect the 2 pieces of conduit together using the coupling (alternatively you can use a dowel or wine cork to hold them together as well), put the curtains on the rod and attach the finials. Finished project below! How do you think it looks?!
")
")

